'UDY Technical Library'
Some Tips on inserting the Stainless Steel Grinding Ring ( or any grinding ring ) into the cyclone sample mill chamber.
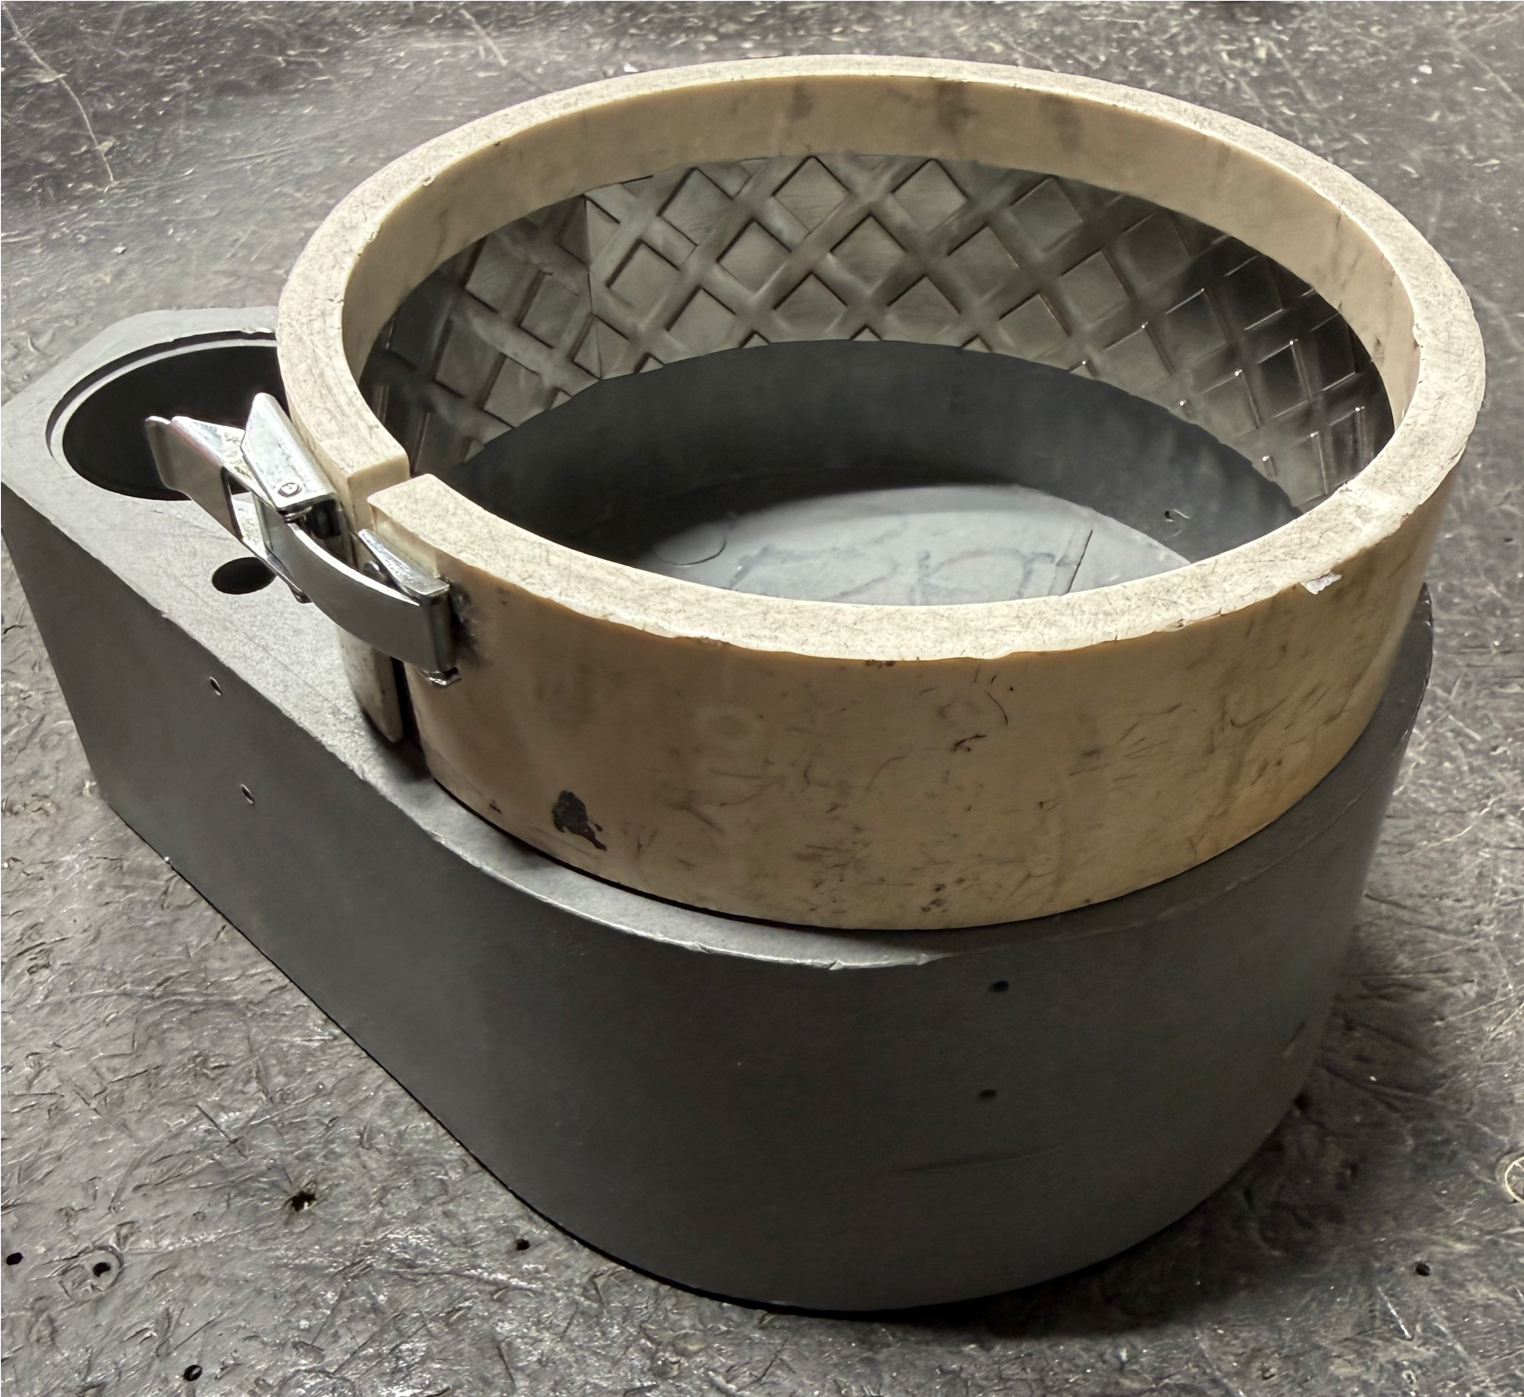
Grinding Ring Insertion tool
This is the insertion tool we use for all grinding ring insertion into cyclone sample mills. This process can be done without this tool however, it seems to make the process a little easier. If you want one of these insertion tools the part number is 30-0176, or just search for grinding ring. NOTE: The one you will receive won't be used like the image.
Remove the impeller and inspect the grinding chamber for rub spots where the impeller may have been run at an angle. (I.E. not perpendicular to the) surface. STOP: If the chamber is warn in this way it will have to be replaced. Stop the installation process. CONTINUE: Remove the old grinding ring. Tap a screwdriver blade between the chamber and the grinding ring where the ends meet - separate the ends of the grinding ring to remove the old one. Clean the inside of the grinding chamber. Place the new grinding ring into the insertion tool. The stainless steel rings are springy. The clamp probably won't close yet- I usually turn this assembly on its side and smash down to close the gap at the ends of the ring. This brings the clamp within range.
With the camp closed, the ring and tool should look like this. Round and seated on the top lip of the insertion tool.
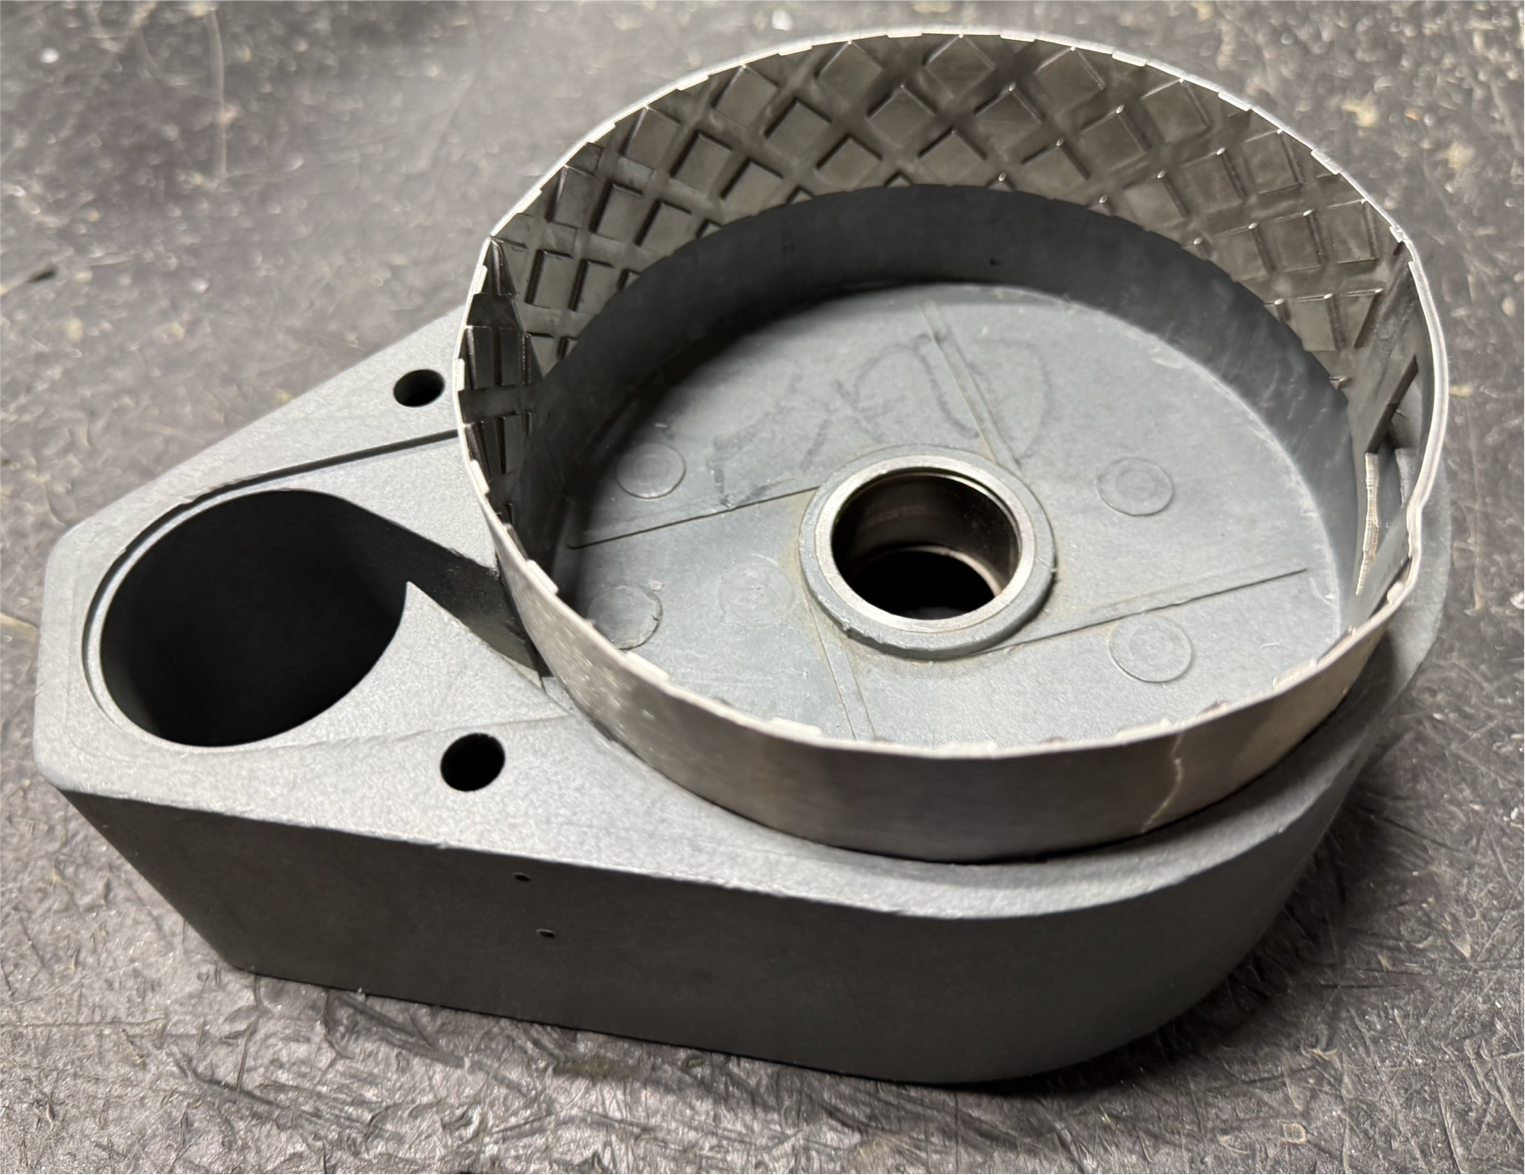
Place the assembly on the grinding chamber - ( shown here on an old chamber for demonstration purposes. Yours will be on the mill. Installation is the same. With a rubber mallet tap toward the center and down until you have the assembly setted as shown. Make sure the ends of the grinding ring are pressed together.
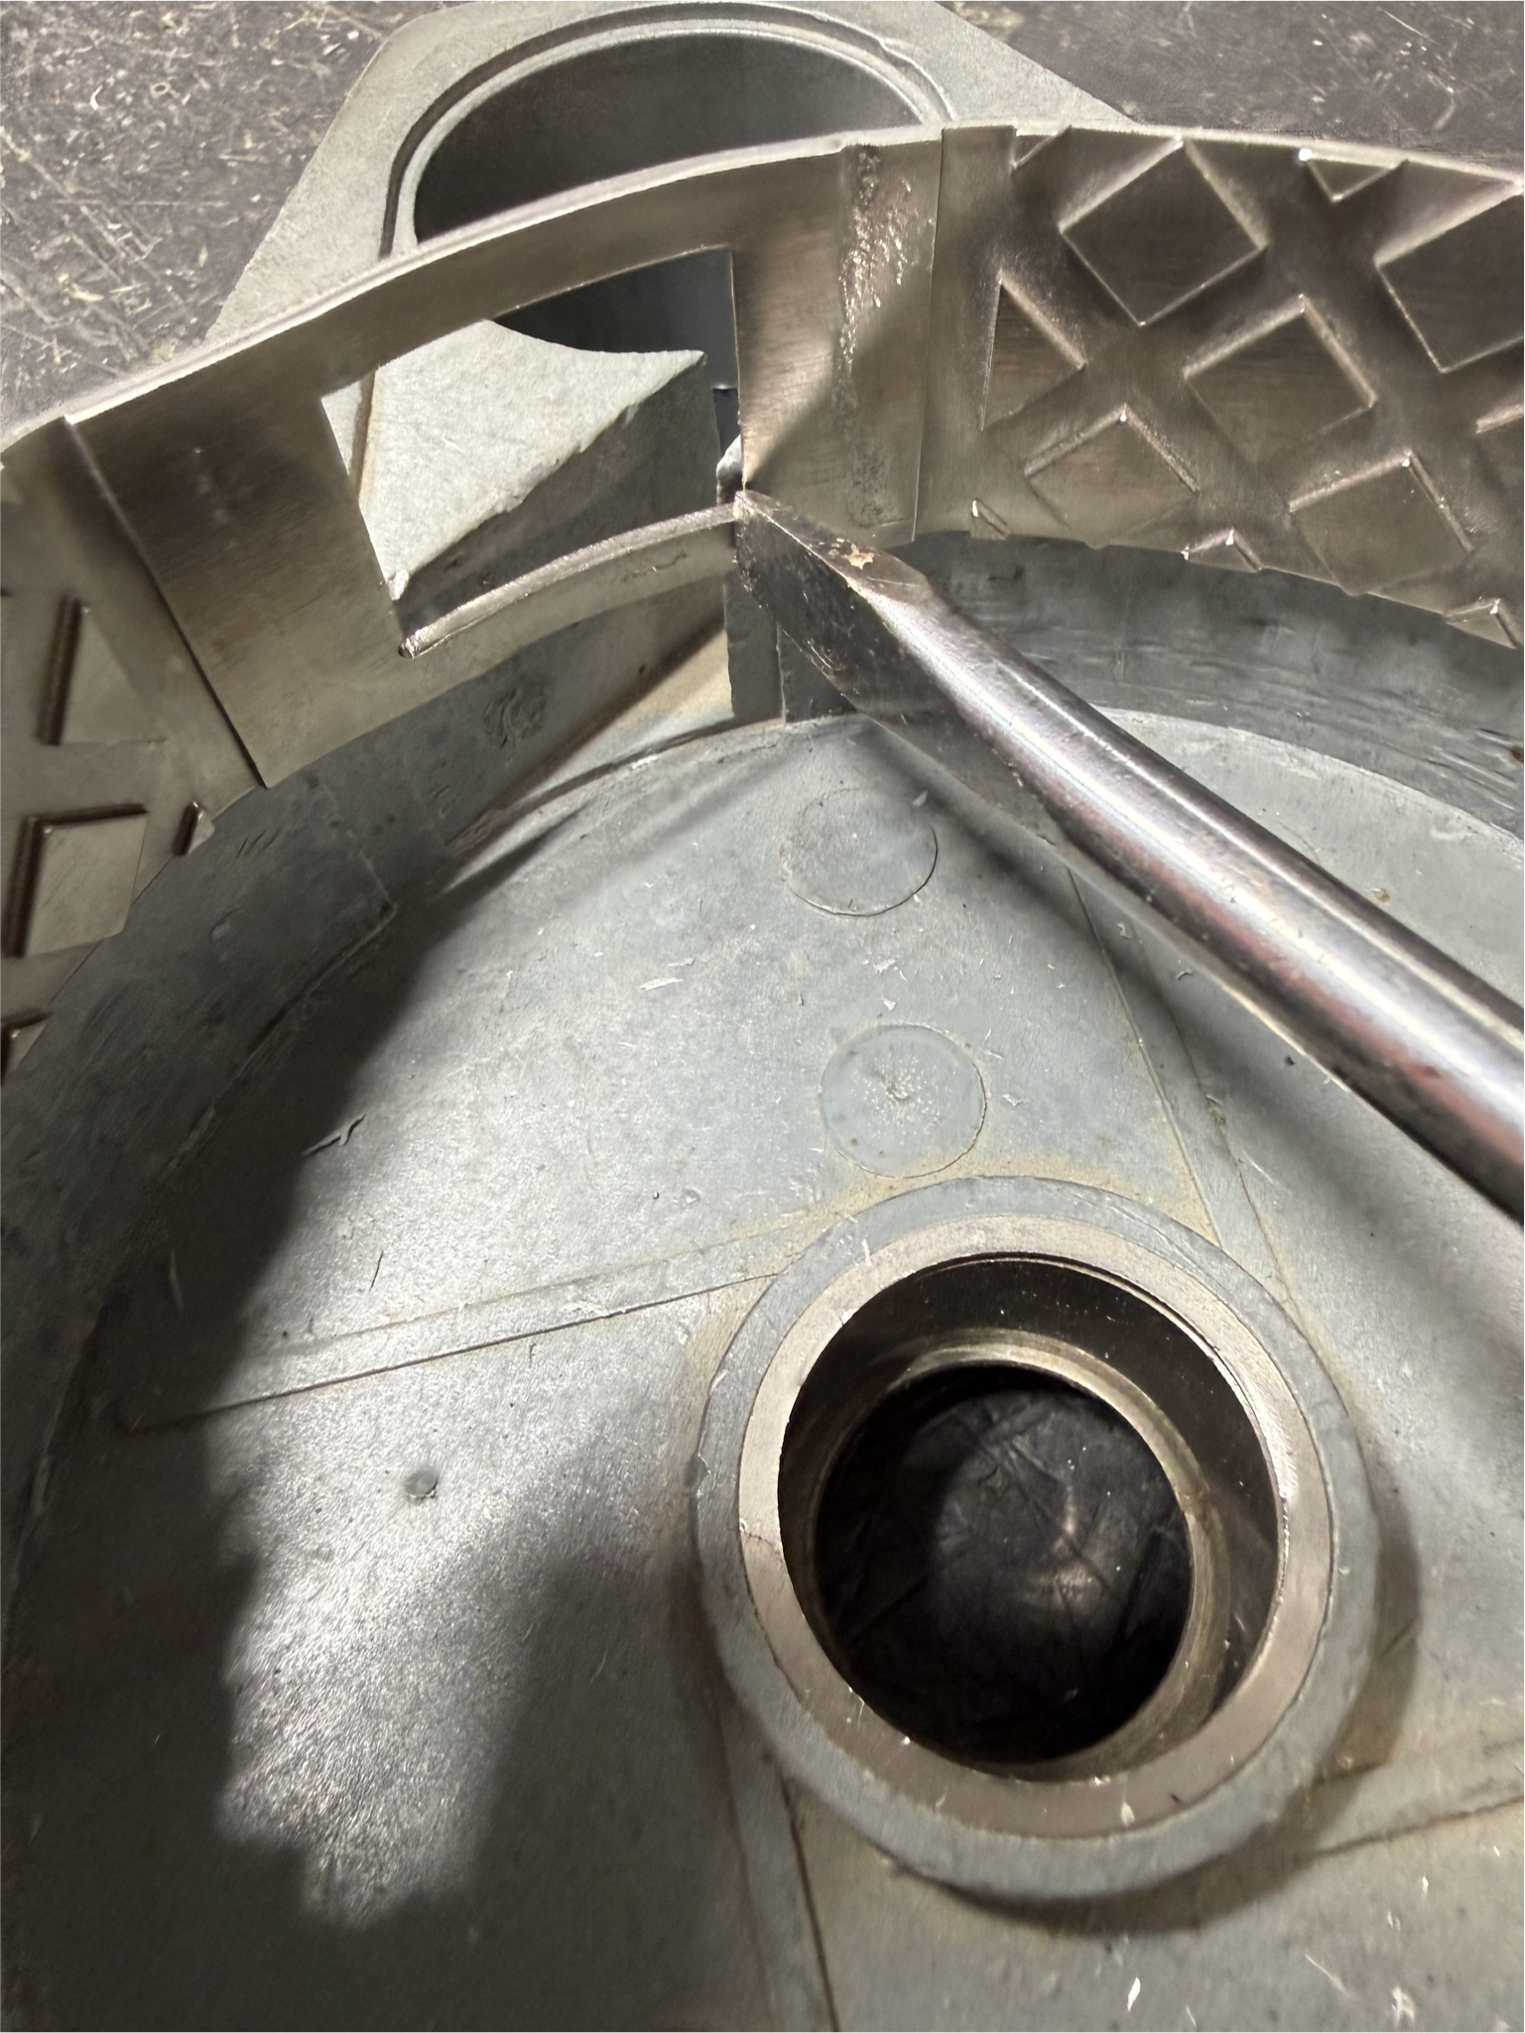
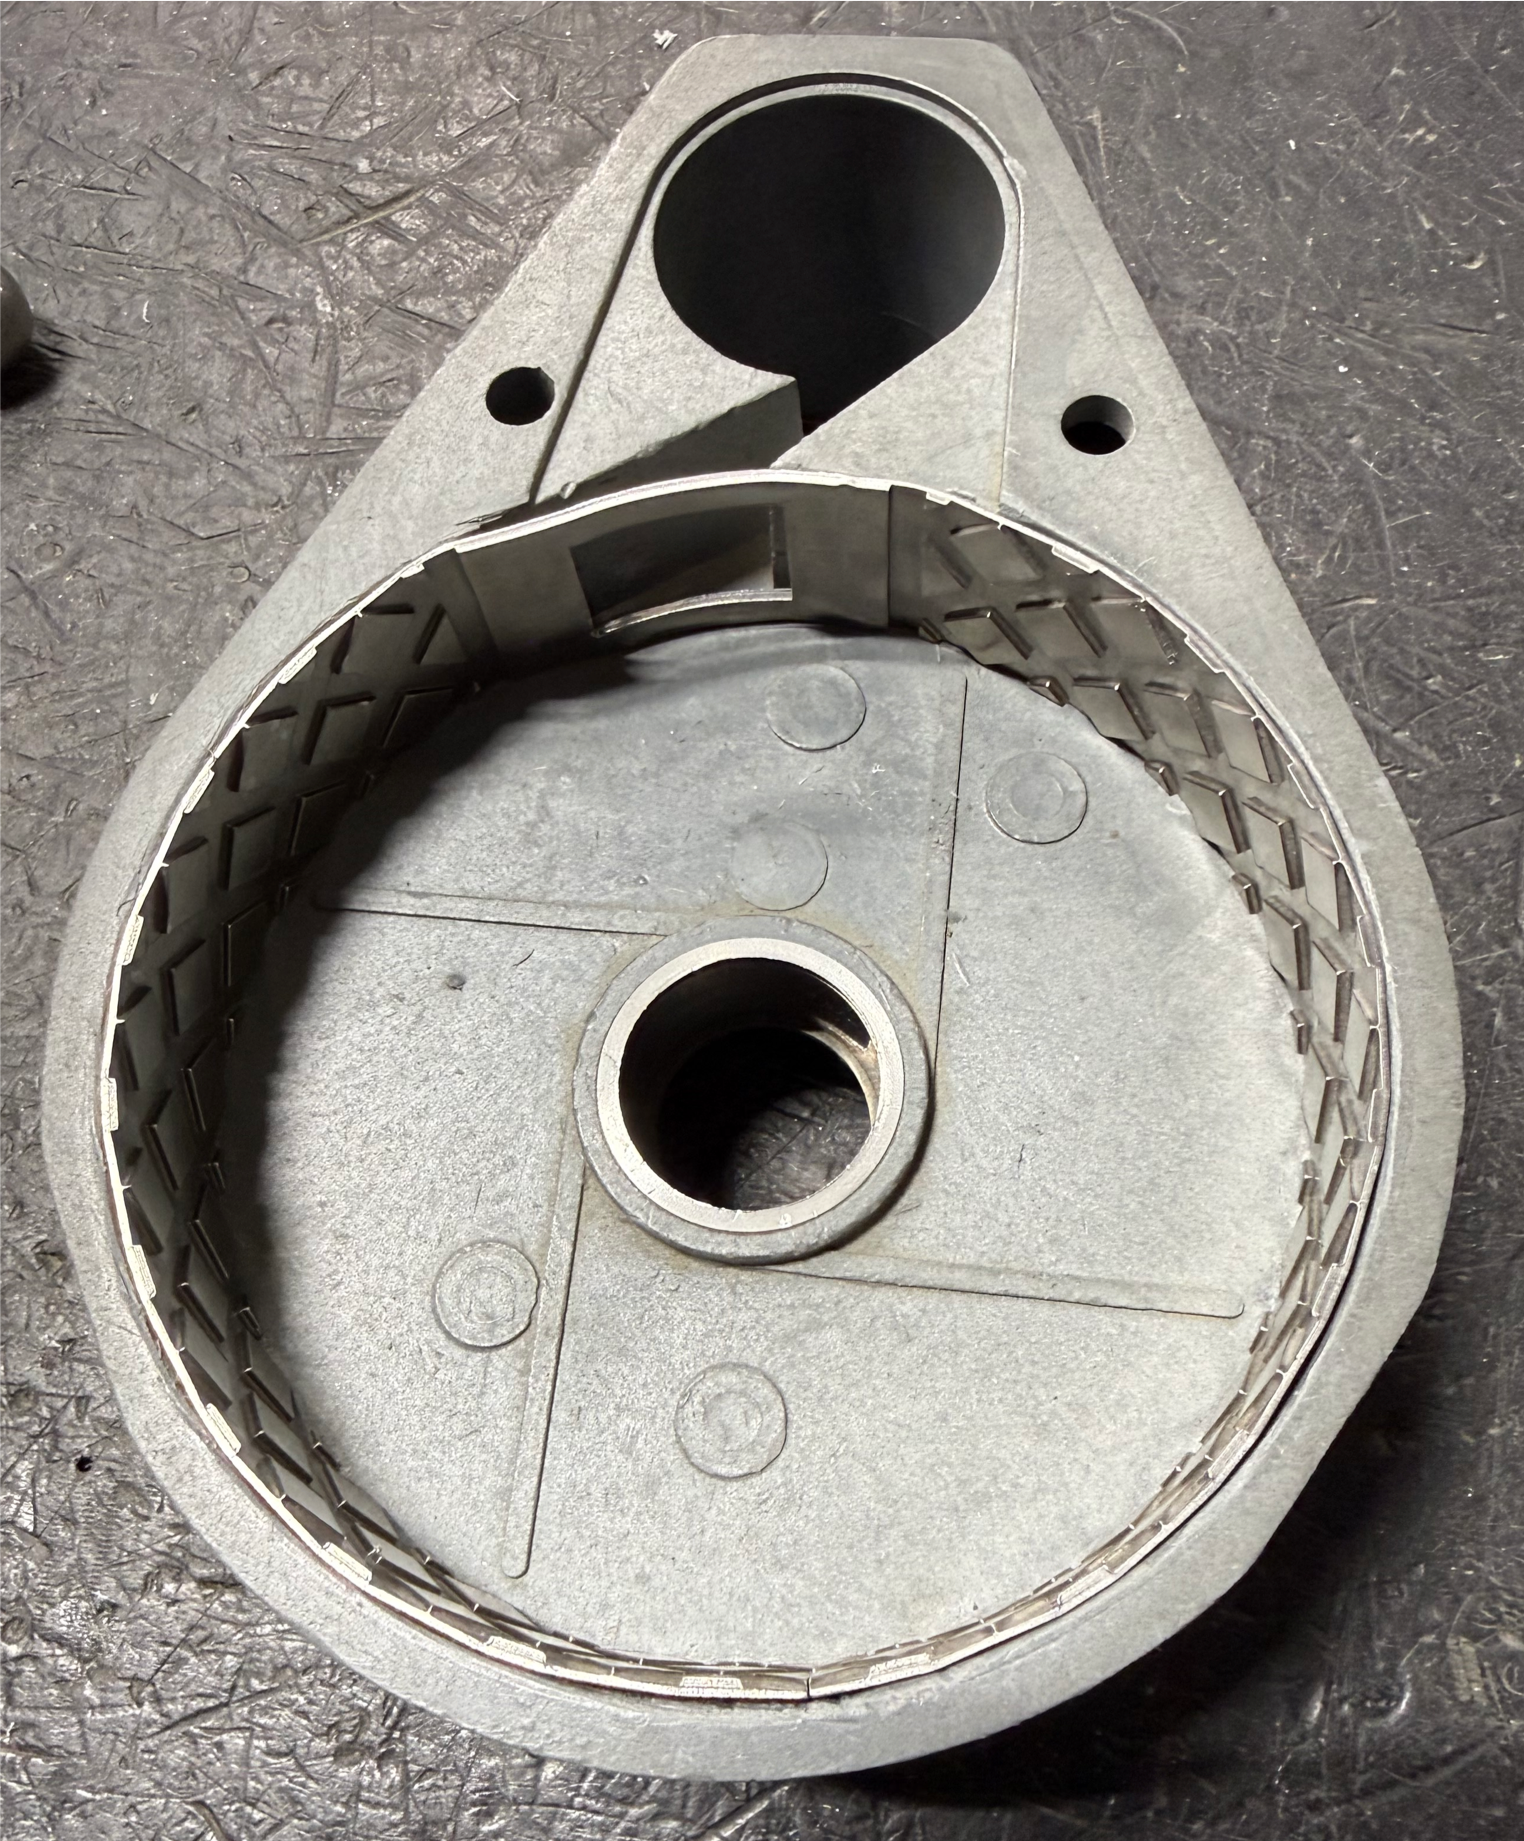
Before the ring is inserted into the chamber, align the screen opening as shown. It does not have to be exact. We apply a smear of silicone adhesive to the inner wall of the chamber. most will not need that, but it's good practice.
CHECK POINT : 1. Insertion tool removed 2. Adhesive added. 3. Screen opening aligned. ( NOT SHOWN HERE ) 4. The ends of the grinding ring are touching each other. You're Ready.
Tap the grinding ring into the chamber - one side then the other then around the chamber so that the ring is inserted evenly. Make sure the ring ends stay together.
Tap around the ring to insert the grinding ring evenly.
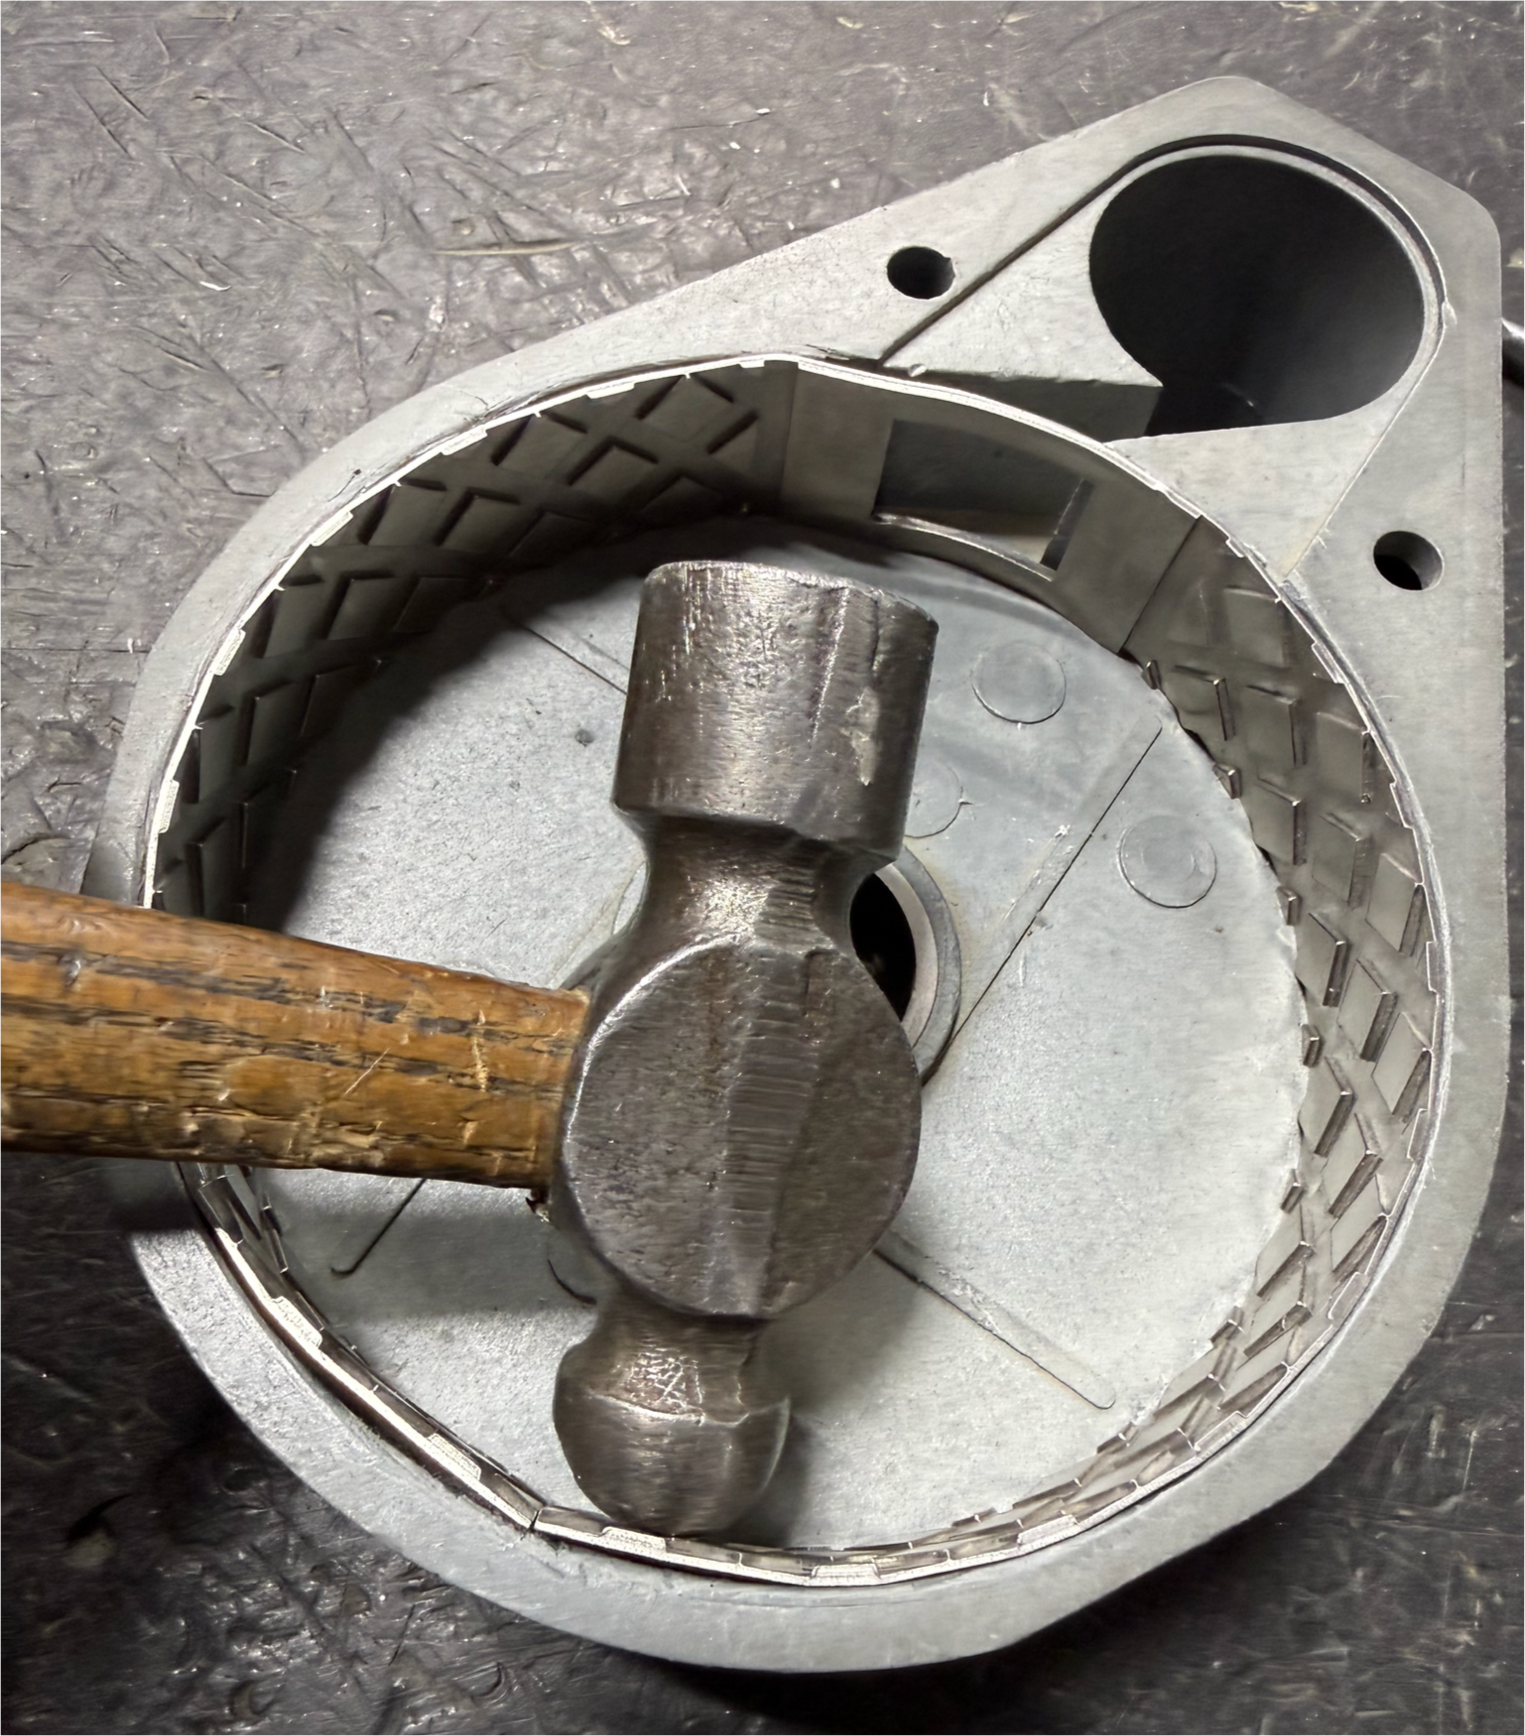
When inserted and all the way down into the chamber inspect the ring as it sits in the chamber Do you see the small gaps at the ends where the ball of the hammer is positioned? Tap the ring into the shape of the grinding chamber.
Grinding Ring Installed
Very nice fit. 1. Screen opening aligned 2. Gaps formed into the chamber. Insert the screen of choice between the ring and the chamber. If the screen is loose, using a screwdriver and the mallet tap the rails of the opening toward the screen to tighten it up a little.
General Notes:
System Links:
Send your Mill in for repair / maintenance
UDY Order Site
UDY Technical Librarary
Thank You for shopping UDY
This process should take about 20 mins the first couple of times you do it. You can always send in your mill for maintenance. We'll replace the grinding ring for you. If you are sending in for repair: The repair system is explained in Udy Technical Library https://udyone.net/udy_tech_lib/mill_service.php You can order: Grinding Ring Insertion tool Grinding Rings all types Screens all sizes Replacement chamber if you want. from our ordering site. https://www.udyone.net/NewUdySite/CycloneSampleMill.php
SAVE TEXT ENTRY